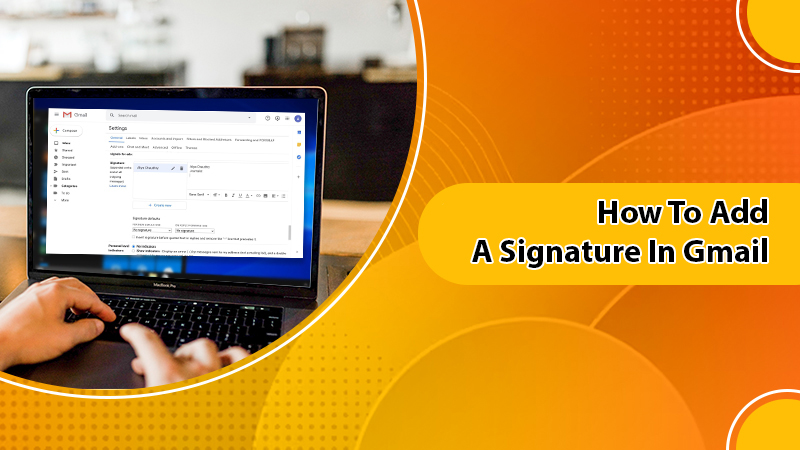
How To Add A Signature In Gmail? A One-Minute Guide

Usually, an Email Signature refers to any text that includes a combination of name, profession, product images, a contact number, or an address. So, create a signature right away and make a strong impression on the recipients. In this blog, you will get a professional guide on How To Add A Signature In Gmail along with providing a company logo at the end of Gmail messages. Keep an eye on the pro tips and implement them to add an email signature to your Gmail account in no time.
One-by-one Gmail Signature Setup Instructions
Email Signatures are a crucial communicative strategy that brings credibility and promotes personal brands. Furthermore, it identically reflects your personality and values. In fact, with the appropriate Gmail Signature Setup, you can make your Gmail profile more professional and eye-catching.
Howsoever, generating a signature in Gmail is straightforward and less time-consuming. So, don’t wag off when it comes to adding your signature to Gmail. Here’s the step-by-step directive you need to simply walk through and perform the execution to have a Gmail signature successfully added. Let’s start!
How To Create A Gmail Signature Using Web Browser – Fruitful Guide
You can use any browser on your Windows or Mac computer in order to quickly and efficiently Create A Gmail Signature. Beneath listed is an easy course of action, have a glance and follow accordingly:
- In the very beginning, open your preferred web browser on your computer system.
- Next, type in “mail.google.com” in the address bar and hit the “Enter” key to see the result.
- Now, sign in to your Gmail account by providing the login credentials into the desired field.
- Once you are on your Gmail account, go to the top-right corner and click on the gear icon which states “Settings.”
- Now, from the drop-down menu, select “See all settings.”
- After that, beneath the “General” section, slightly scroll down to locate the option of “Signature”
- Now, click on the “+ Create now” tab.
- In the “Name new signature” popup window, provide the specific name of your signature and then click on “Create.”
- Now, in the appeared box, type the information that you would like to mention in your signature.
- You can also edit the font of your signature text such as font size, bold/italic, text structure, hyperlink, etc.
- After working on your font and being happy with your signature, choose when to use it by navigating to “Signature Defaults.”
- Now, opt for the location wherever you want your signature to appear simply by checking the box next “Insert signature before quoted text in replies and remove the ‘–‘ that precedes it.” In case, you leave this option unchecked, the signature will appear at the bottom of the message.
- Now, in the end, scroll to the bottom of the page and hit on “Save Changes” to apply the changes.
This is the exact procedure for How To Add A Signature In Gmail On Mac or Windows computer using a browser. You won’t face any hurdles while following these given intuitive guidance as they are easy and much-simplified.
How To Add A Signature In Gmail On iPhone – A Stepwise Instruction
The signature you created on your Windows PC will not be automatically added to the emails you send from your iPhone. You have to create a separate email signature by using the Mobile app on your iPhone. However, knowing the facts about How To Add A Signature In Gmail App is dreadful, especially being an iPhone user. Fortunately, the technical tips that will lead to accomplishing the task of adding Gmail Signature to iPhone are covered underneath. Let’s go through it!
- First and foremost, open the Gmail app on your iPhone.
- Then, tap the three-line menu “☰” which is at the top left corner of the screen.
- Afterward, scroll down and choose the “Settings” tab.
- Now, under the “Settings” section, scroll down to locate the “Signature Settings” option and give a hit on it.
- Now, shift the toggle button from left to right next to the option of “Mobile Signature” to turn it ON. Doing so will allow your iPhone to use your signature when sending emails from your Mobile device.
- Now, mention the name of your signature.
- Finally, click “Done” to save the Gmail signature.
Now, you know How To Add A Signature In Gmail app on your iPhone and proficiently add the signature you want to use in your Gmail account. After doing so, whenever you attempt to compose a new email, your signature will be added to your email message.
How To Set Up Gmail Signature On Android Phone? Quality Tips
The process of adding a Gmail signature on an Android phone is pretty much similar to the process of adding it on an iPhone device. Yet, the comprehensive guide to Set Up Gmail Signature on an Android phone is noted underneath. Have a short glimpse of the course of action:
- Open the Gmail app on your smartphone.
- Tap on the “☰” symbol from the top-left corner of the screen.
- Slightly scroll down and click on the gear icon to open the “Settings” window.
- Now, opt for the Google Account in which you want your Gmail Signature Setup proactively.
- Now, scroll down to locate the “Mobile Signature” and then place a single tap on it.
- On the new popup, type the pieces of info you would like to display in your email messages when sending them.
- After that, hit the “OK” tab.
- You will get back to the previous screen where you can see your signature populated in your Mobile Signature section.
Every time you compose an email, your Gmail signature will be added to the email-composing box.
Effective Ways To Create a Professional Signature In Gmail
If you want your signature design in a professional manner while creating it in Gmail, go through the below-noted details. The proffered pro tips will lead to adding your signature more professionally to your Google Account within a jiffy.
Tips 1: Add Your Contact Details
As the email you send is going to be professional, you need to consider the following elements:
- Your Full Name
- Your Job Title
- Organization Name where you currently work
- Phone Number
- Your Complete Email Address
Tips 2: Add Hyperlink
You will have to add at least one hyperlink for something like your website, email address, or your social media accounts. To do so, follow these steps:
- First, select the signature text you want to hyperlink.
- Click on the “Link” icon.
- In the popup display, you will have to option to hyperlink the highlighted text with a web or email address.
- After choosing the option and mentioning the display text, hit the “OK” tab.
Now, the highlighted text will have a hyperlink.
Tips 3: Add Your Company Logo
Add an image like your Company logo to an Email Signature Text field. All you have to do is to walk through the following course of action:
- First, place a click on the “Insert image” icon.
- Select an option you want to use for adding an image to your email signature.
- Well, to insert the image directly from your PC, click the “Upload” or “My Driver” tab and find the image you want to upload. After selecting an image from your device, click on the “Select” tab to add the image.
- But, in case, you want to host the image, click the “Web Address (URL)” tab. Paste the URL of your image into the field and finally click on the “Select” tab.
- Now, once done, the image will appear in your Gmail signature.
Learn How To Add A Signature In Gmail Via Gmail Support
The top-to-toe guidance for How To Add A Signature In Gmail is at your fingertips. Just after making a proper implementation of the aforesaid tips and techniques, you can add your Gmail signature to your account. If you get stuck in the middle of the process of creating an email signature, do not panic! Contact our adroit Gmail Support team via placing a call at the 24/7 helpline number. Their assistance will be more effective and valuable in creating a signature in Gmail.
FAQ:
How Do I Create A Custom Email Signature?
In order to create an email signature in your Gmail account, follow the below steps:
- Click on “New Email”
- Go to “Signature” and select the tab.
- Choose the “New” option, type a name for your signature, and hit “OK.”
- Under the “Edit Signature” section, type your signature and format it the way you want.
- Click “OK” and close the email.
- Now, you can see the signature you created when opening a new email.
How Do I Add A Logo To My Gmail Signature?
Here’s the right procedure to Add A Logo To My Gmail Signature within a minute:
- In the text editor menu of your Gmail Signature box, tap on the icon “Insert Image.”
- Select an image from your Google Drive, upload a file from your computer, or else type the URL of your logo into the text field.
- In the end, click “Select” to finally your logo uploads into the signature.
How Do I Create A Professional Signature In Gmail For Free?
If you really want to Create A Professional Signature In Gmail without paying a single penny, you have to insert the following elements:
- Your Full Name
- Contact Details
- Email Address
- Your Profession
- Your Social Media Account’s Link.
How Do I Add A Picture To My Gmail App Signature?
Adding a picture or a logo to your Gmail app on an Android phone or iPhone device is not possible. All you have to do is to open a Gmail account using a browser despite opening a Gmail app. Therefore, if you really want to insert an image in an email signature, do it from your computer system.


